My Craft Blog

Hi there, my name is Marcia, I am happy to meet you and share my craft makes and ideas with you. I hope you enjoy looking. Please feel free to join my blog and leave me comments, especially if they are helpful ones! I love to learn new craft techniques and am more than happy to share the ones I have found. Thank you for looking.....

Friday 7 November 2014

Christmas Card Sneak Preview 2

Another sneak preview of what I've been up to over the last few weeks!!  I haven't had this much fun in ages!!  Normally my card making is a mad panic to finish in time before they have to be posted off, but this time I am finished (boo hoo)!  I will make some more though, special ones for immediate family, so I don't mind sharing these with you as most of the people who will receive them will not see this post, phew!!! Again, Stampin Up feature prominently in my supplies list, the products are so good and everything co-ordinates, which is very handy!

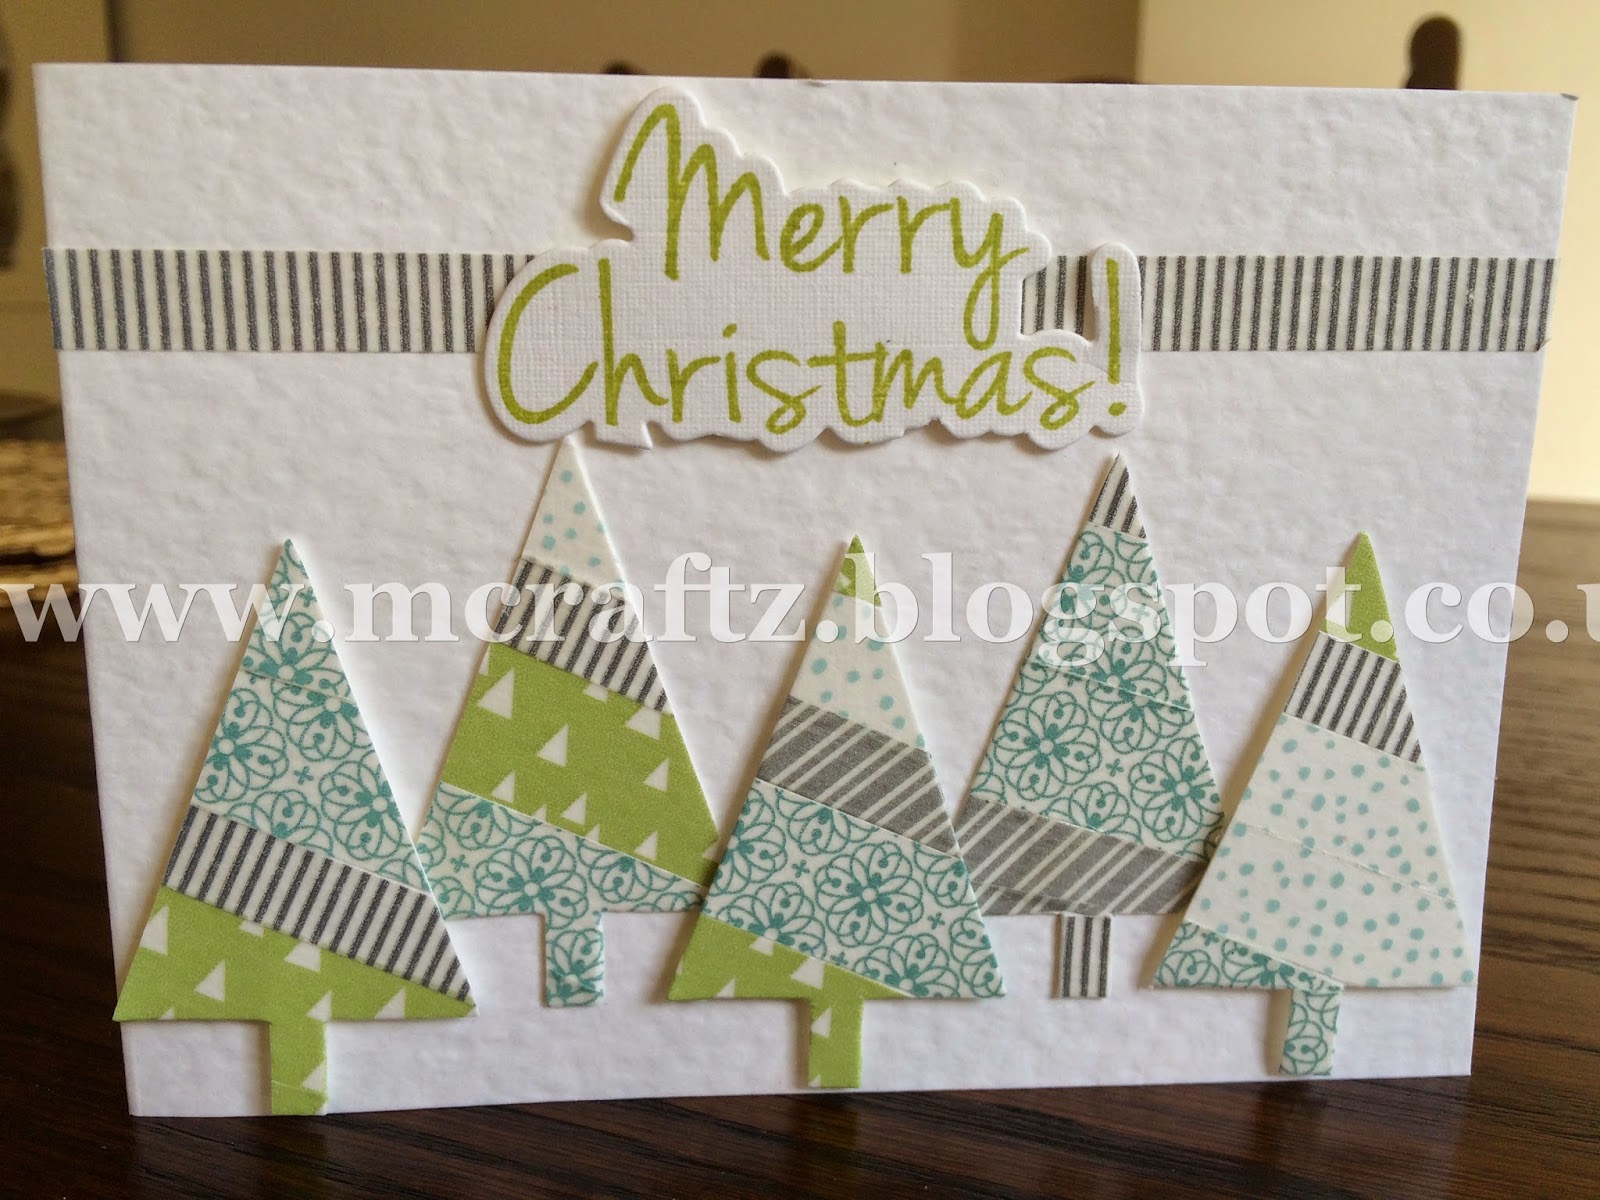
 Anyone who knows me will know I have a "thing" about trees! So no surprise when I saw this lovely stamp set and punch...just had to be done! 
 And then there's the Washi Tape...oh no!
 Had to have Snowflakes!
And white embossing powder!
Ok, so here is the supplies list,  Stamps: Ornamental Pine, Festival of Trees and Serene Snowflakes. White cardstock, Bashful Blue Stampin Up cardstock, Inks: Bashful Blue, Lucky Limeade and Versamark, WOW white embossing powder and the Festival of Trees Punch (Stampin Up)


I hope you've enjoyed looking, and maybe got some inspiration for your own Christmas Cards!  Please leave me a comment, I will be very happy to hear from you!


Christmas Card Sneak Preview!

I am in crafting heaven!  I watched a demonstration on the new British Craft Network channel on stamping and paper piecing.  Although I have dabbled in paper piecing in the past, I have to say this demo by Francoise from Woodware Stamps really grabbed me!  Suffice it to say I had to purchase this lovely stamp and have a go!  Well, 25 Christmas cards later....I still love it...although I have made all my cards now, I think I may have to just keep making to satisfy my "need" lol !!  The supplies used are: Woodware Stamps Patch Robin, Stampin Up DSP stack Trim The Tree, Versafine Black ink, Wink of Stella clear glitter pen.

These cards are 4.75inches square, and I also made some smaller ones you can see below...


Oh boy, did I have fun!!  Thank you for looking and please leave me a comment or ask a question!


Halloween Treat Boxes

I know we don't normally celebrate Halloween here as much as is done in the USA but I felt inspired to make the oldest grandchildren some little treat boxes! They were made using the wonderful Stampin Up Curvy Keepsake die, and their very appropriately named Pumpkin Pie cardstock! I just stamped assembled the box then whilst it was still flat, stamped them with the SU woodgrain stamp in Tim Holtz Aged Mahogany Distress ink.  I cut some leaves from some Sizzix dies to embellish and tied them up with Stampin Up Bakers Twine.  


I didn't want the boxes to look scary in any way so no spooky faces or anything!  The eldest grandchild is only two and a half!  I filled the boxes with a few small pumpkin wrapped chocolates, a pumpkin balloon, plastic spider and finger puppet.  The kids loved them!


I will be using this Curvy Keepsake Die a lot over the coming weeks, as I intend to make some little gift boxes for the Christmas Tree and the Christmas Table!  

I hope you have enjoyed this post, thank you for looking and I would be very happy to receive your comments.


Wednesday 27 August 2014

Welcome to Your New Home!

My friend has just moved house, so I made this card for her.  For the woodgrained background I used the SU stamp and Rose Pink card but with Ranger Picked Raspberry Ink. This is a very large stamp so rather than use a block I prefer to stick the stamp to the craft table then ink up the stamp and put the card face down on top! Rub all over thoroughly! Perfect impression every time doing this....Result!  The cute little birdhouse was a freebie from a magazine and the first time I have used it, but I will definitely use it again.  I coloured it with Promarkers and then used a pink Promarker to freehand draw the lines around the edge. It had to have a bit of sparkle, so I coloured the little blue birds with my clear Wink of Stella brush.  Sorry you can't really see the sparkle in this picture.  This is a sweet little 5 x 5 card, very girly and just right for my friend!

Hope you like it and thanks for stopping by!

Candles Birthday Card

This is a very nice and effective card, you can make it using scraps if you have enough.  I used papers that I had as a freebie from a magazine give away!  I saw a similar design on Pinterest so cannot claim it as totally my own, but the inspiration inspired me to have a go at giving it my own slant.  The design on Pinterest used a star punch or stamp which I don't have so I had to improvise.  Anyway, I like it and will probably make it again very soon as there are two more important birthdays coming up!  This one was for a boy and I was very happy when he phoned me to say he really liked it!  Recognition at last!!!

Hope you like it too, and thanks for stopping by!

Tuesday 10 June 2014

Sizzix Die Flowers


 I made this simple card just using a new Sizzix die flower that I bought ridiculously cheaply in a sale!  Bonus!  I love this die so much that I have already made loads of stock cards with it, in all sorts of colour combinations!  I had this background paper in a booklet of papers from a magazine giveaway and love the colour, and it coordinates really well with Stampin Up's Pool Party card.  I used another Sizzix die for the embossed panel as I like to try and add some texture on most cards.  Couldn't resist adding a few more small flowers and jewels on the bottom left of the card, just because I can!!  


I added some dimension to both the flower and the Happy Birthday panel, you can see this better from this angle.  I just buy my foam tape from the local pound shop - bargain!


Thank you for stopping by, hope you like this card.  It would be great to receive your comments on this blog - until next time......

Zentangle for Carina

 I was stuck for an idea for my daughter Carina's birthday card this year, no inspiration was forthcoming!  Then "bingo" Zentangle!!  I used one of the talented Ali Reeve's masks for the outline and then just got completely inspired by the shapes.  I left the design black and white as the original zentangle concept and decided to mount it just the same.  It was a little bare so I have added a huge bow in lovely black satin wired ribbon that has a gold edge.  This just lifts the card and gave me somewhere to put the greeting!!  The other reason for doing it this way is, if at a later date she wants to display the card as a picture, she can just take the bow off and pop it into a frame - job done!  Hope she likes it!


A better view of the huge bow!


The inside had to get the Zentangle treatment too!
Thanks for stopping by hope you have enjoyed looking at my zentangling.  I would love it if you left me a comment on this blog.....until next time.......

Tuesday 6 May 2014

Zentangle the evening away!


I've had a few days off from my normal craft activities so decided to have a play with Zentangle.  I find this art form very relaxing and it is so easy to pick up or put down to complete later, you choose!  The original idea of Zentangle was to be plain black and white, but I also like to use colour sometimes, depends on my mood! I just purchased some new masks from Stamps Away (Ali Reeve) and really love them all!  These are the first ones I've tangled....watch out for the others!  So sorry about the quality of the photograph, the light was terrible earlier!

Thanks for stopping by......leave me a comment if you like what you see!

Wednesday 30 April 2014

Shaun's Card

Shaun loves all things fish!  He has marine fish tanks in his house, with beautiful fish and corals.  He also likes to sit, sometimes for days, fishing at a local lake!  So his card was an easy choice to make!  I used the wonderful Crafters Companion Kraft card for the base and a page from an old book for the background, with a bit of distress ink for the edges.  Whilst I was in the mood for using scraps, I stamped the lovely woodgrain from Stampin Up onto a bit of scrap Kraft card and ripped the bottom edge.  Then the image, also from Crafters Companion, was stamped onto another piece of scrap card (doing well here!).  The sentiment is from Sassy Salutations set which I love. Birds are the Marianne Design dies and are so useful, I have even been know to cut the birds off if I just need foliage!  

Hope you've enjoyed looking and thanks for stopping by!

Saturday 15 March 2014

2nd Birthday!

I had a great time making this 3D box "card" for my lovely granddaughter Eden's 2nd Birthday.  I am not sure where the last 2 years have gone to, and she seems to be growing up fast, bless her.  I used my Silhouette, and a cut file from Lori Whitlock, to cut out all the pieces and it certainly made short work of it I have to say!  Some lovely strong Kraft card for the base and just some random paper I had from a magazine freebie to brighten it up.  The dilemma was: nowhere to right a message!!  So I made a tag to match - problem solved!  A few flat backed gems to add some bling for a little girl and there you are - done!  We had a great day on her birthday at Paultons Park all coming home happy but very tired!


Happy 2nd Birthday Eden!

Man's Card in Blue

It's been a hectic few weeks, what with appointments, work and birthdays!  My crafting has had to take a bit of a back seat, however, think things are slowly getting less crazy (well I hope!).
I made this one for my nephew's birthday (a few weeks ago now) using Stampin Up set Open Sea and some of that lovely black ribbon I got for 50p!! The blue is the lovely Bashful Blue, also from Stampin Up.  Hope you like it, he did!

Tuesday 28 January 2014

Quirky Little Tree

This little tree stamp was with the others I mentioned earlier that were sitting in the bottom of a drawer, unused!  I quite like it, although it is a bit sort of Easter Egg shaped!!  Anyway, stamped and then coloured with Promarkers and mounted onto SU yellow card, I thought it looked a bit spring like, but also a bit bare somehow!  I found some quite thick string that I've had for ages, split it down and glued it around the edge for added interest! I am entering this in the Case This Sketch #61 challenge this week.


Here's a close up!


Thank you card


I found this little birdie stamp in the drawer and am ashamed to say I have never used it!  I think it's rather sweet, so will probably use it again!  Not sure where it came from, but it was with others in a set which were free with a magazine, have had them for ages!  The other stamps I found when I was rummaging were Mix and Match Borders from Papermania - again unused (hangs head in shame) so when I saw the Simply Less is More sketch I knew they were just right!

Here is the original sketch - hope you like my take on it!


Sunday 19 January 2014

Black and Gold

Here we are again with the dreaded mans card!  We were in town and went into a cut price shop where I saw, and fell in love with, this black and gold harlequin ribbon, and it was only 25p for 3 metres in the sale! I got a £1's worth!! I could immediately see it's potential as it is not often you can use ribbon on a man's card.  For the gold harlequins I used a Stamps Away mask and Pebeo gilding wax, rubbed through with my finger.  I then stamped the motorbike image with a Stampin Up stamp with Versafine Black ink onto a very grainy card as I wanted it to have a vintage feel.  To keep the colour theme going, I inked part of the motorbike with a Sakura gold metallic pen.  The sentiment and stamped harlequins are also from Stampin Up. I am entering this card for the Cas(e) this sketch #60 challenge.
Hope you like it, and thank you for looking.

Friday 17 January 2014

Hearts!

 This is my entry for the Simply Less is More blog for this week - very late I know!  The brief this time was for a one layer card and the theme of Hearts - well with Valentines Day on the horizon - very handy!  I used a mask to make all the hearts, with Stampin Up Cherry Cobbler ink as it's a nice shade of red.  I stamped the rose in black versafine ink and then "painted it out" using bleach.  I love using bleach as it gives a quite a vintage feel to any project.  You can use just ordinary household bleach and if it's a bit thick, just water it down a bit. Remember to wash your brush out well afterwards or the next time you come to use it, there may be no bristles left!!  A very simple card, but effective. 
Hope you like it, and thank you for looking!

Have also entered this card in the Papermill Direct blog challenge  here :Papermill Direct


Wednesday 8 January 2014

Winter Blues

I decided to start entering blog challenges again wow!  I have been so busy lately and the amount of time I have been able to devote to crafting has been limited boo hoo!  I have found a couple of challenges which give you two weeks to enter, so that is much better for me!  
I have made this card for the Less is More challenge which asks for Winter Blues and also the Artful Times Challenge where the brief is just for shades of blue.
I used Stampin Up lovely as a Tree stamp set, which is my favourite.  The background is made using the masking tape technique, which I really love with these trees, the inks are Wisteria Wonder, Ballet Blue and Bashful Blue.  The trees are then stamped in Night of Navy. I love how the masking tape gets less tacky the more you use it, creating a slightly different effect every time!  Hope you enjoy looking as much as I did creating.