Hi there, my name is Marcia, I am happy to meet you and share my craft makes and ideas with you. I hope you enjoy looking. Please feel free to join my blog and leave me comments, especially if they are helpful ones! I love to learn new craft techniques and am more than happy to share the ones I have found. Thank you for looking.....
I watch a lot of videos about crafting and using different techniques and one of the people that inspires me is Helen Allen. Helen follows the Guru that is Tim Holtz. Tim produces a tag every month for each year i.e. Twelve Tags of 2015 and Helen makes her own slant on these. I have had a go at making one myself as I was so inspired by Helen's April tag. I used mount board at the base, which was great as it's very sturdy! The iris stamp is one of Sheena Douglass' great creations and I love it. I used Tim Holtz distress inkpads and Wink Of Stella before putting on a topcoat of Glossy Accents.
Here are a few closeups - I do hope you can see that lovely shimmer from the Wink of Stella!
Thank you for stopping by, I do hope you have gained some inspiration!
I know we don't normally celebrate Halloween here as much as is done in the USA but I felt inspired to make the oldest grandchildren some little treat boxes! They were made using the wonderful Stampin Up Curvy Keepsake die, and their very appropriately named Pumpkin Pie cardstock! I just stamped assembled the box then whilst it was still flat, stamped them with the SU woodgrain stamp in Tim Holtz Aged Mahogany Distress ink. I cut some leaves from some Sizzix dies to embellish and tied them up with Stampin Up Bakers Twine.
I didn't want the boxes to look scary in any way so no spooky faces or anything! The eldest grandchild is only two and a half! I filled the boxes with a few small pumpkin wrapped chocolates, a pumpkin balloon, plastic spider and finger puppet. The kids loved them!
I will be using this Curvy Keepsake Die a lot over the coming weeks, as I intend to make some little gift boxes for the Christmas Tree and the Christmas Table!
I hope you have enjoyed this post, thank you for looking and I would be very happy to receive your comments.
The start of my zentangle Christmas Cards - I must say I have had so much fun doing these, I just wish my hand was steadier! I used Ali Reeve's masks for the outline onto Centura Pearl card. The background is SU lucky limeade stamped with SU Serene Snowflakes
Again Using Ali Reeve's mask for the outline, this time backed onto SU Cherry Cobbler and stamped with Serene Snowflakes
This one is totally my own design!
I had the idea that I could mass produce cards like this and that all my cards for posting would be simple to make and cheap to post! I would just draw one image, then photocopy it onto coloured card, bling it up a little, job done - oh how wrong was I !!! The drawn image did not photocopy onto the chosen card - probably because the card is textured and so I had to re-ink the whole lot - boo hoo! Anyway, I am quite pleased with the result.
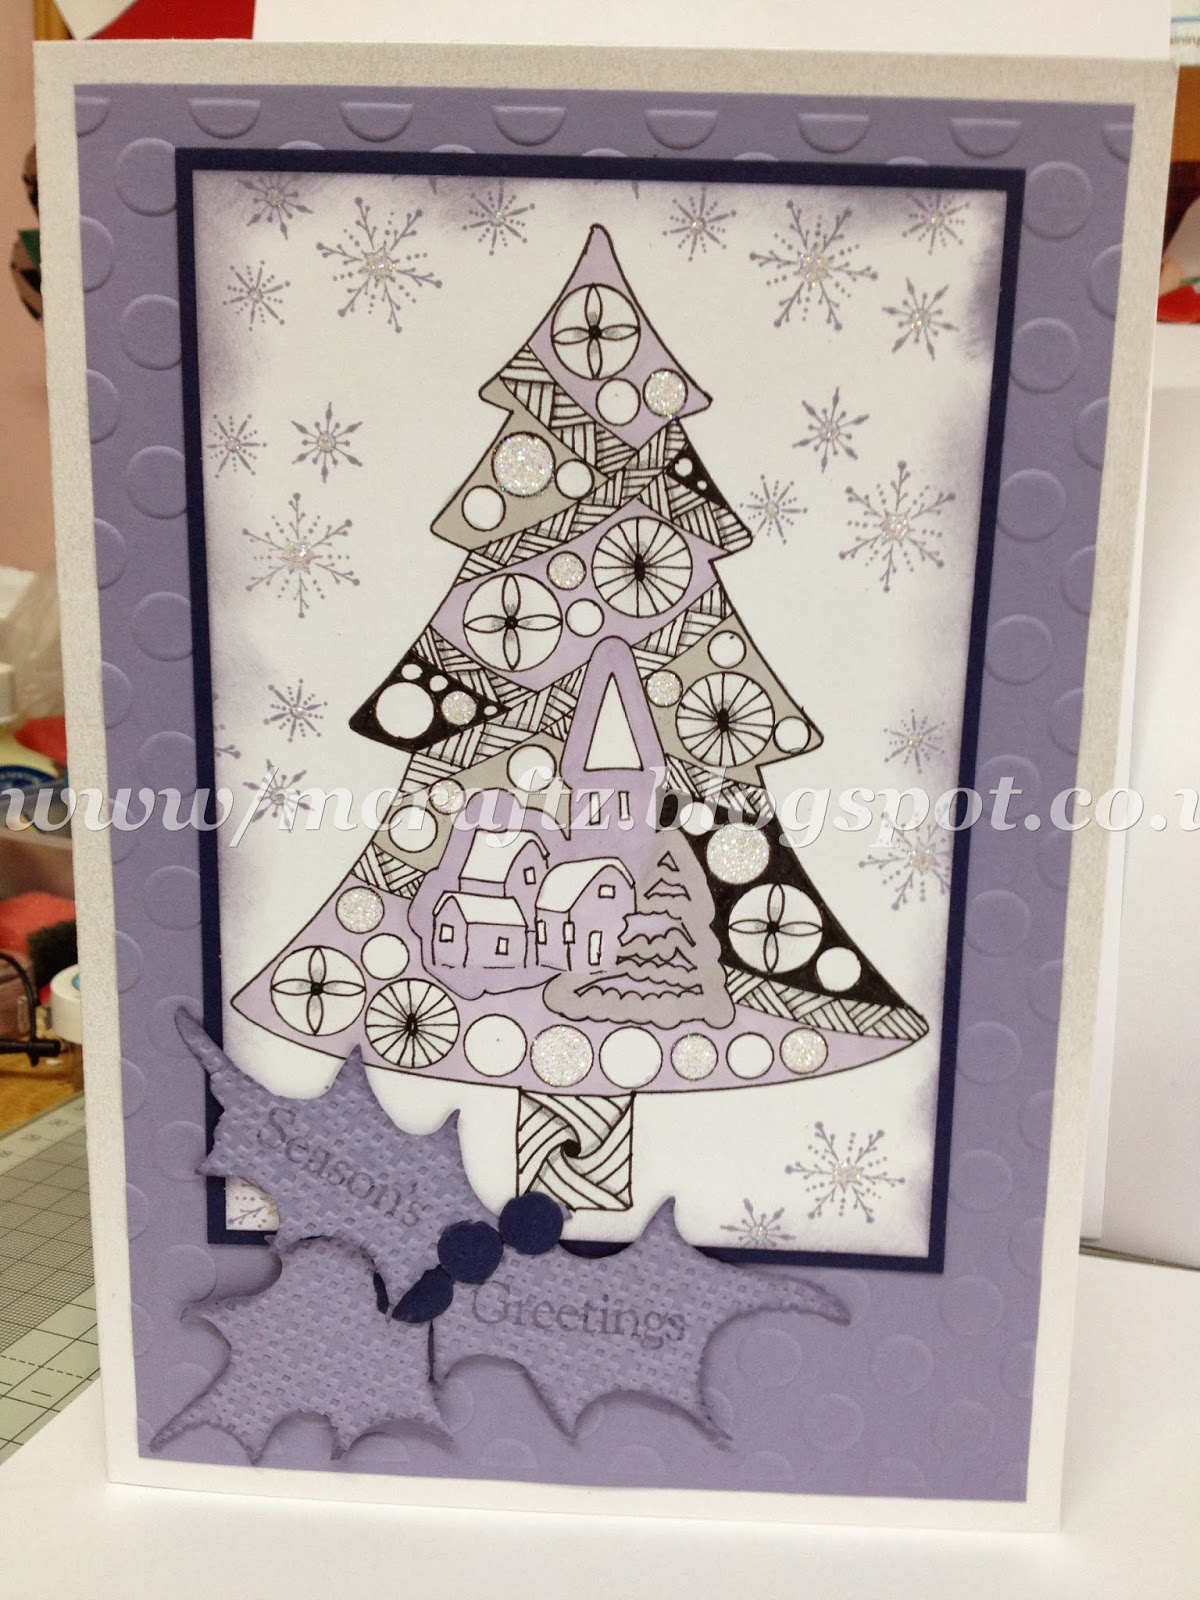
I am very happy with how this one turned out! I used Ali Reeve's mask again, but wanted something nice to put in the middle (less drawing for me!) After various experiments, I settled on this Marianne Design Die, which I drew around for the shape, then just inked in the detail freehand. I used a Promarker to ink in the background of the design. The cardstock is SU Wisteria Wonder, Serene Snowflakes again (well it is Christmas!). I used Tim Holtz holly die which I love and stamped the greeting onto the holly before running through an embossing folder to add a bit of texture.
I hope you enjoy looking at my efforts - if you have any questions please contact me, I will be more than happy to help if I can!
I have wanted to do a mixed media piece for a long time and when I saw a very plain pine mirror at the carboot - for 50p I just had to have it! I knew it had to have a crackle effect base, so that's where I started! Painted the base coat a lovely dark pink, acrylic paint, then applied a coat of crackle medium specially designed for use with acrylic paint. Waiting for this to dry sufficiently is always a problem as I am so impatient! Once dry (about 30 mins) I then applied another coat of acrylic paint, this time in cream. This part is always great as you can see the paint crackle before your very eyes!! I then gave the whole thing a couple of days to settle down and harden before I did a little light sanding all over just to roughen the finish a bit. In retrospect I think I prefer the finish you get just using ordinary household emulsion paint and pva glue for the crackle as you get a smoother matt finish. Then it was on to the exciting stuff - I used Sheena Douglass ivy stamp for the leaves, then hand painted them with Pebeo Acrylic paints. After that it was simply a matter of applying a little extra decoration here and there, so I tore strips of some papers I already had, inked the edges with Tim Holtz Spun Sugar and the middles with Antique Linen as they were just too white! Applied with a little watered down pva glue for a good smooth finish.After that it was just a large flower to be added and a few butterflies and there you have it - finished!
I had so much fun doing this, and it doesn't look too bad for a 50p bootsale mirror!
I hope you enjoy looking at this as much as I enjoyed decorating it!


 Here are a few closeups - I do hope you can see that lovely shimmer from the Wink of Stella!